
Mikuni round-slide carburetors are some of the most common and reliable carburetors found on classic motorcycles and powersports equipment, and rebuilding one is definitely a gearhead rite of passage. If you’ve got a bit of mechanical sense and a basic set of tools, you can definitely get the job done, and finally have that old bike running again.
We’ve rebuilt enough Mikuni carburetors to field an entire army of powersports equipment, and have a few tricks up our sleeve for getting the job done right. It’s a pretty simple affair, and we’ve outlined the whole process in this how-to video below using some really crusty VM34s from our 1972 Suzuki Titan 500. If this isn’t your first rodeo with a Mikuni round slide, we’ve outlined five key areas that could improve your carb-rebuilding game.
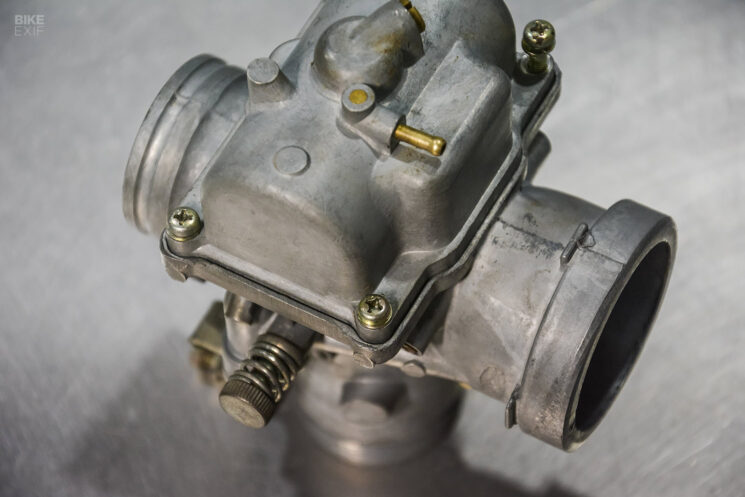
Fuel Bowl Seems elementary, I know, but there are several ways to screw up removing a Mikuni round-slide fuel bowl. Mikuni uses four JIS (Japanese Industrial Standard) screws to retain the fuel bowl. JIS drivers and screws aren’t designed to “cam out” at a specific torque like Phillips screws are. In most cases, you can get by with a standard Phillips, but the correct tool would be a JIS No. 2.
Once the screws have been removed, you’ll notice the bowl will remain stuck to the carburetor body, and a few smacks with the handle of your screwdriver will loosen it up. This is a point where it pays to take some extra care. The original bowl gasket on the Mikuni is pretty tough, and you can almost always reuse it. However, the gasket can sometimes stick to the bowl and the carb body, and it can tear if you continue removing the bowl.
If this happens, run a small straight blade along the bowl gasket surface to separate the gasket from the bowl. If the gasket isn’t torn, it’s fine to reuse it as long as your gasket surface is clean.

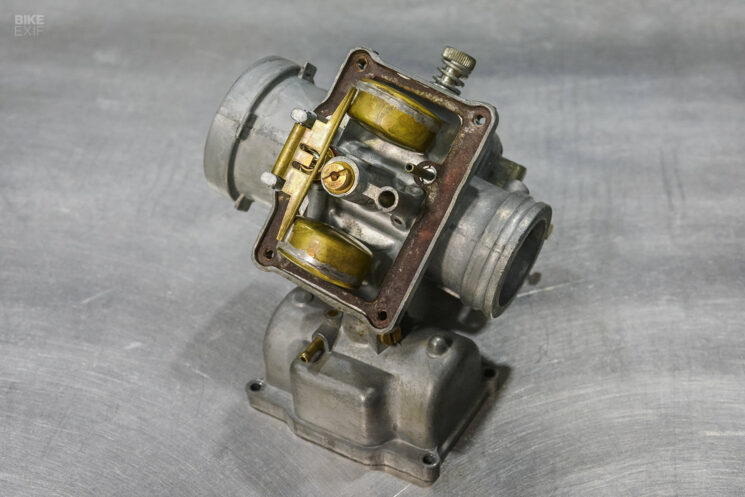
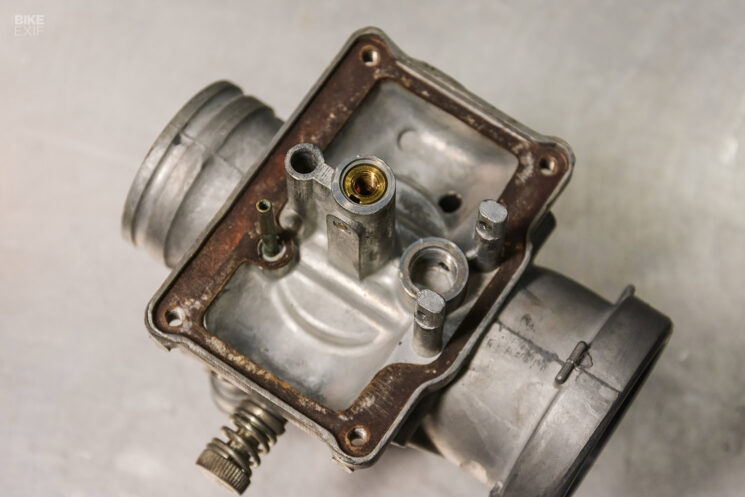
Float Assembly Your Mikuni round slide will have either brass or composite floats, and the assembly is a little different for each. With either setup, you’ll have an arm that interfaces with the needle and seat; brass floats are usually affixed directly to the arm, while composite floats extend from the bowl and push on the arm with small pins.
The float arm pivots on a pin that goes between posts on both sides of the needle and seat, and you’ll have to remove the pin to access the needle and seat. On this carburetor from our Suzuki Titan, the pin doesn’t have a head on it, and simply fell out after jostling the carb. On many other Mikunis, this pin will have a head on one side, and the holes in the posts are actually tapered for a tight fit. Make note of what side the head is on, and be sure to reinstall it in the same direction.
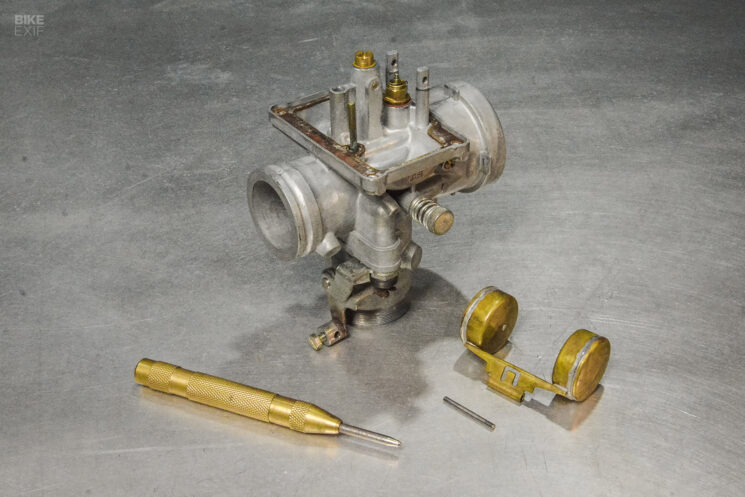
We’ve found a light-duty, spring-loaded center punch to be the tool of choice for removing tight float arm pins. While the spring action seems harsh, we’ve never broken a float arm post off using a spring-loaded center punch. I can’t say the same for a standard punch and a hammer.
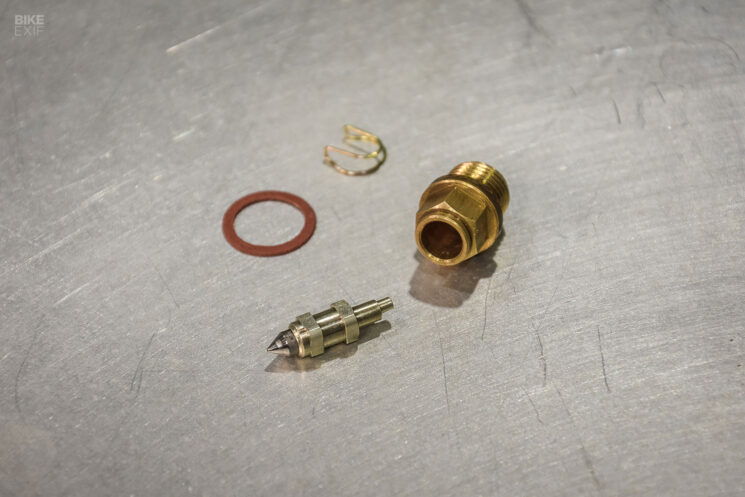
Needle and Seat Assembly You can rebuild Mikuni round slides over and over and not have an issue with the needle and seat, but when it finally happens, it’s a headache you won’t forget. The needle and seat both have a tapered surface where they interface with each other, and it’s imperative that this surface is perfectly clean. If there are visual imperfections, it’s usually junk, and sometimes even a perfect-looking needle and seat assembly can leak fuel.
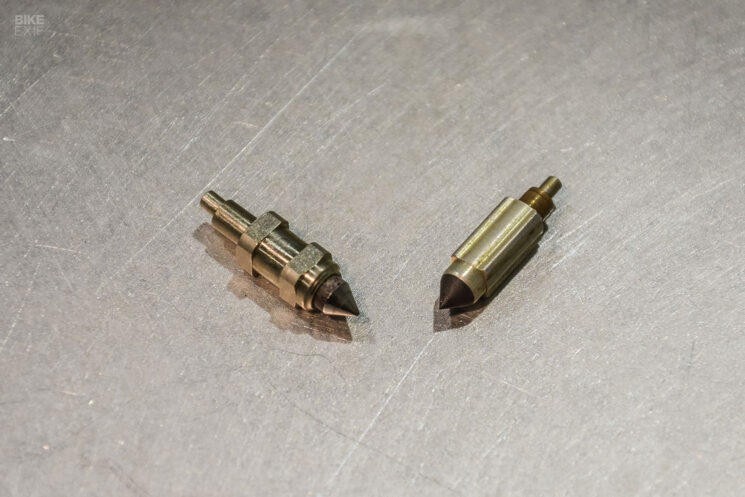
If your machine is hard starting, wants to flood out or has gas leaking from the carburetor vent lines, the needle and seat could be your issue. If cleaning it doesn’t work, you’ll have to replace it, and we opt for the viton-tipped needles whenever possible.
If you suspect the needle and seat is leaking, there’s a simple way to test it. With the carburetor fully assembled, suspend a suitable fuel reservoir a foot above the carb with a half-gallon of fuel in it and connect a fuel line to the carburetor. If the needle and seat are leaking, you’ll notice fuel in the carburetor body after a few minutes. This process is simple (albeit somewhat of a moot point) on a motorcycle with a gravity-fed fuel tank, but if you’re working on something with a fuel pump, it saves you a bunch of kicking, pulling or cranking, as the fuel bowls are now pre-filled.
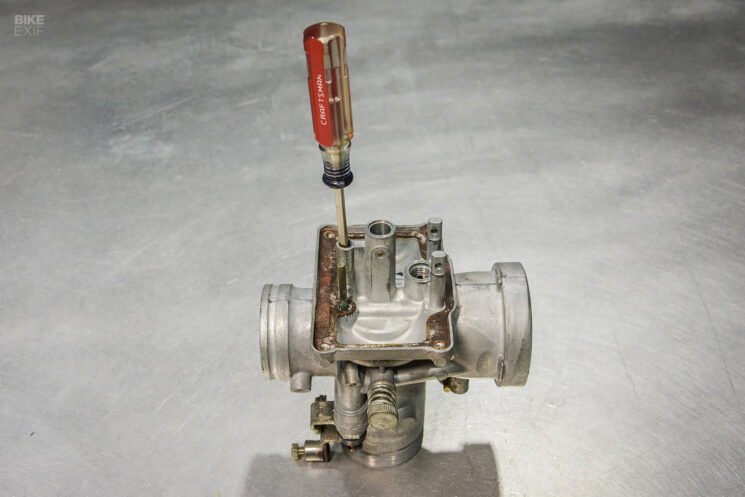
Pilot Jet The pilot jet is the smallest jet in a Mikuni carb and has tiny orifices, and as such, it’s almost always clogged. The pilot is hidden in the tube forward of the main jet, and you need a very specific screwdriver to get it out. My weapon of choice is a 1/8″ Craftsman straight blade, and if memory serves, I even took a little material off the sides on the widest part of the blade.
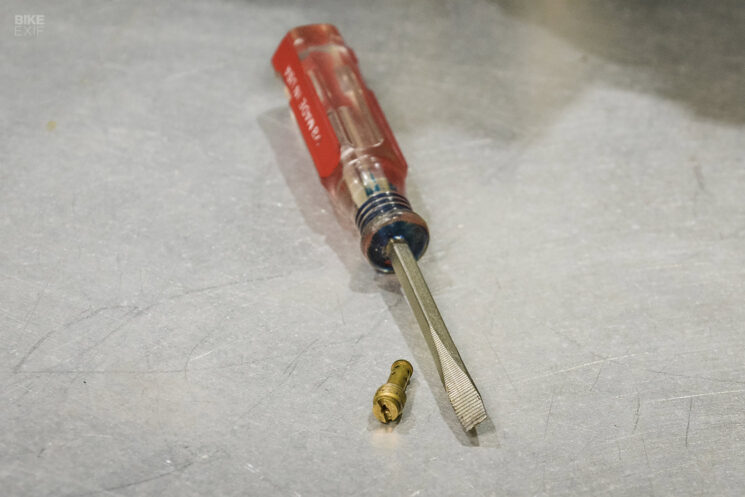
You’ll want to apply lots of downward pressure when extracting the pilot jet, as the jet is made of brass and the slot is small. If you strip it, you’re in a world of hurt.
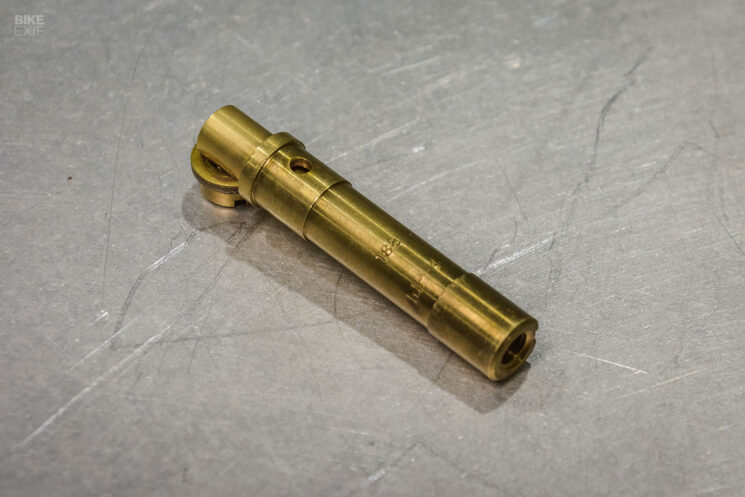
Emulsion Tube The emulsion tube is hidden underneath the main jet, and can be a real pain to remove given its tight fit in the carb body. Many tinkerers opt to leave the emulsion tube in the carburetor for cleaning, but there are a couple of good reasons to remove it.
For one, there’s always some old fuel trapped along the side of the emulsion tube, and if left for too long, it’ll turn gummy or crusty, making the tube more difficult to remove. With the emulsion tube out, you can clean it much better, and you’re able to read the part number and verify that it’s the correct piece. Remember that emulsion tubes and jet needles are matched, and swapping to a different jet needle profile may require a different emulsion tube.
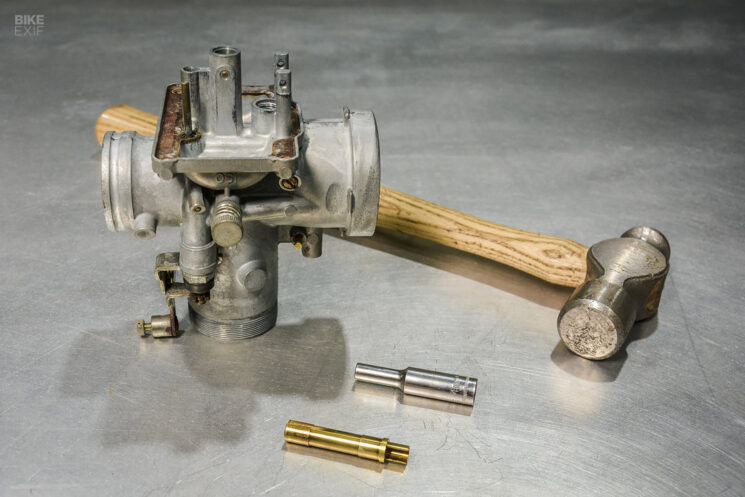
After removing the main jet, we’ve found the best tool for removing the emulsion tube is a small deep-well socket—usually something in the neighborhood of 4 mm. Pick one that doesn’t interfere with the emulsion-tube locating pin, and remember not to hit the threads, or they’re toast!
Want to see the process in depth? Check out the video below to see our VM34 go from barn-fresh to minty.